
Wave Editor Guide: Build a Boss and Beat Your Route

Wave Editor lets you build a custom route for the wave, test it, and fix awkward sections immediately. Your goal is simple: guide the object through the corridor without touching obstacles. Build a route that can be completed before adding decoration, and introduce difficult ideas one at a time. A boss works best as a sequence of readable attacks with short breaks, not as one solid wall of traps.
How do you make a boss in Geometry Wave Online Editor?
Build the boss as several short phases where obstacles act as attacks and the safe route remains visible.
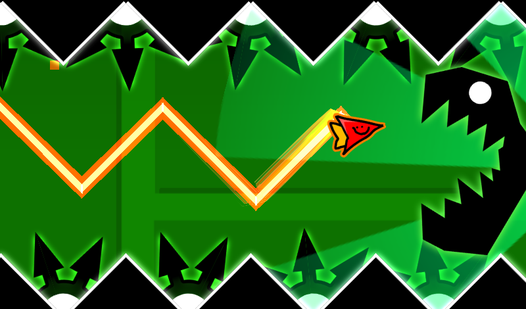
Design the behavior before the appearance. The first phase can teach one attack, the second can change the direction of the danger, and the third can combine patterns the player already knows. This makes the fight readable even without elaborate animation. If the editor supports movement, switches, or events, connect them to the moment the player enters a separate zone. If it does not, a static route can create the same impression: the corridor shape can feel like dodging strikes, jaws, claws, or projectiles.
Place the boss silhouette away from the safe route. The player should see the threat without confusing decorative parts for obstacles. Repeated elements help explain an attack: the same shape should usually behave in the same way. Show a new danger in an easy form first, then reduce the room for movement.
Put brief recovery spaces between phases. After a dense section, widen the corridor so the player can stabilize the wave and read the next pattern. The finale can be faster or tighter, but it should not demand a reaction to something that appears without warning. Test the fight several times with different routes. If only one memorized rhythm works and the pattern cannot be read in advance, you have made a trap rather than a boss.
How do you make objects opaque in the editor?
Set the selected object to full visibility or turn transparency off. If there is no separate setting, use a solid element without a translucent layer.
Look in the selected object's properties for transparency, visibility, color, or alpha controls. Full opacity is usually at the opposite end of the scale from a completely invisible state. Labels may differ between editor versions, so rely on the preview: the background should not show through the object.
If the item still looks faded, check more than its base color. A shared layer, entrance effect, overlapping decoration, or the background color may change the result. Remove effects one at a time and test again. This quickly reveals which setting is weakening the contrast.
Use a clearer silhouette for gameplay obstacles than for decoration. Players need to distinguish a dangerous edge from the background at a glance. Do not make every part of the scene equally solid. Large opaque decoration near the route can hide the wave or the safe opening. If an object is only decorative, move it away from the play line or reduce its visual weight with color instead of uncertain transparency.


How do you play step by step?
Start with an empty route and make it consistently beatable before you spend time on decoration.
- Open the editor and create a new project to get a clean field without someone else's objects.
- Mark the start and finish so the intended length and direction are clear.
- Build a wide basic corridor to test wave control without extra distractions.
- Add one obstacle type and play the section to check whether its edges are readable.
- Tighten only selected spots so difficulty arrives in episodes instead of covering the whole route.
- Place visual warnings before turns so the player can prepare for a direction change.
- Build a boss phase from familiar shapes so it tests skill rather than guessing.
- Test from the beginning to judge transitions at the proper pace.
- Remove anything that hides the route or looks dangerous despite having no collision.
- Save a working version before adding detail so the beatable foundation is never lost.
After every meaningful change, replay both the new piece and the few seconds before it. Difficulty often breaks at a transition. The player may enter a narrow gap at a bad angle or lack time to change rhythm after the previous maneuver.
How do you build a difficult but fair wave corridor?
Keep the movement line visible and increase difficulty through turning rhythm, not sudden hidden traps.
Wave movement alternates between rising and falling, so a good section reads like a rhythm pattern. A long straight gives the player a rest, short switches test control, and changes in width demand more accurate timing. Combine these ideas, but introduce a new combination at a manageable pace.
Watch the entry angle. A gap may be wide on its own yet become nearly impossible if the previous wall sends the wave toward it from above or below. Try entering the section on a deliberately imperfect line. If a small error can still be corrected, the corridor is fair. If any deviation guarantees a crash several seconds later, add recovery space.
Contrast is part of difficulty too. An obstacle edge must be visible before the player reaches it. Similar background and wall colors, oversized decoration, and sudden brightness changes make a simple route difficult for the wrong reason.
How should you test a level before saving it?
Test the route in passes: find impossible geometry first, check readability next, and judge the artwork only after both are sound.
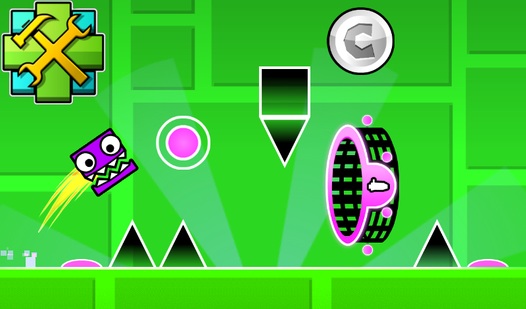
Play slowly on the first pass and inspect the geometry. Is there a corner that catches the wave? Does the visible edge match the collision area? Can you reach the finish without a perfect start? On the second pass, play at normal speed and mark every moment that forces a guess. On the third, make small mistakes on purpose: press a little early, release a little late, and approach a turn on another line.
Do not change five places at once. Fix one bad fragment, replay it with the approach included, and then continue. Otherwise, you can repair a local trap while accidentally breaking the rhythm of the whole section. Keep a separate working copy before a major rebuild. If the new version is worse, you will not need to reconstruct the route from memory.
It also helps to give the level to another player without instructions. Do not explain where to press. Watch which elements look dangerous to them, where they hesitate, and which mistake finally explains the rule. If the central mechanic needs a spoken explanation, add a visual example inside the level.
Which mistakes usually ruin boss levels?
Hidden threats, decoration that resembles obstacles, and abrupt difficulty spikes between phases cause most problems.
Do not ask the player to watch a huge boss figure, tiny projectiles, and a narrow corridor at the same time when all of them are new. Each phase should test one main idea. Extra decoration is fine while obstacle edges remain obvious.
Another common mistake is starting an attack the instant it becomes visible. Warn the player with shape, open space, or a repeated pattern. A player can lose because of a bad reaction, but they should understand what went wrong. An unexplained collision teaches nothing and becomes annoying fast.
Do not confuse length with difficulty. Three nearly identical repetitions rarely improve a fight. Show a pattern, make it harder once, and move to the next phase. If the finale demands precision, shorten the route leading to it or make the earlier section stable. Replaying a long introduction after every error gets tiring.
Which techniques do I use when building a route?
I test every difficult section for readability, room to recover, and a fair transition from the previous maneuver.
First, I build the route with gray or simple blocks and ignore decoration until I can clear it several times in a row. That tells me whether the problem is geometry or visual noise. If a section is already irritating without artwork, artwork will not save it.
Second, I leave one safe example before a new attack. The player sees the shape and connects it with the movement that follows. On the next repetition, I can reduce the space or change the angle because the rule is now familiar.
Third, I test the entrance to a narrow corridor from high, middle, and low lines. If only the middle line survives, I check whether the player had a readable way to reach it beforehand. Without that cue, I widen the entrance or rebuild the previous turn.
Finally, I temporarily remove the background and decoration. If the route reads well without them, I restore elements in groups and run a test after each group. This quickly identifies the layer that covers an obstacle, makes an item look translucent, or hides the safe opening.
FAQ
Can you make a boss without animation?
Yes. Build a static silhouette and place several attack-like route sections around it. Changes in corridor shape will create the sense of phases.
Why does an opaque object still look faded?
Check its color, layer, background, and entrance effects. Sometimes transparency belongs to a group or an overlapping effect rather than the object itself.
When should you add decoration to a level?
After the basic route can be completed consistently. Add decoration in small groups and test readability after each group.
How can you tell that a level is too difficult?
If a threat cannot be seen in advance and one small error guarantees failure with no chance to recover, simplify the section or explain it more clearly.