
Wood Block Unblock Walkthrough and Strategy

In Wood Block Unblock, your goal is to clear a corridor and guide the target wooden block to the exit. The central rule is simple: do not move the nearest obstacle at random. Trace the full chain of blocks preventing it from moving, free the last block in that chain, and then unwind the sequence in reverse. This reduces wasted moves and keeps the board from turning into a dead end.
How do you beat Wood Block Unblock online?
The most reliable method is to start at the exit and plan the required moves backward.
First, identify the target block's direct route. You usually do not need to take it around the entire board. You only need to clear the row or column between the block and the exit. Mark every piece crossing that corridor, since those pieces define the real problem.
Do not rush to move the first obstacle. Check where it can go and how much empty space it needs. If another block occupies those cells, the visible obstacle is not your first task yet. Follow the dependency to the next piece. Moving one final blocker may require two or three earlier adjustments elsewhere on the board.
After every setup move, check the exit corridor again. Continuing an old plan automatically can waste moves because the new arrangement may have opened a shorter solution.
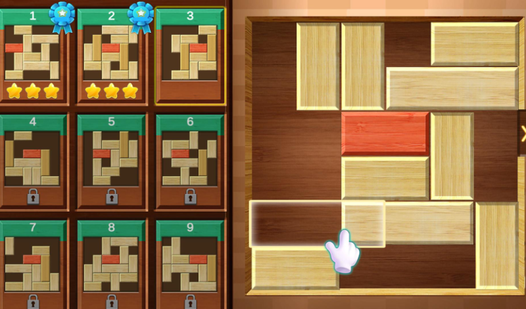
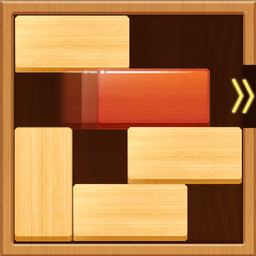
How should you read the board before your first move?
The board becomes easier to understand when you see corridors, empty cells, and movement restrictions instead of a pile of separate pieces.
Locate the exit, the target block, and the line connecting them. Then inspect the orientation of every obstacle. An elongated piece normally moves only along its own axis, so a horizontal block cannot be removed with a vertical drag. It needs open space on its left or right.
Empty cells are especially important. They are not useless gaps but working space for rearranging pieces. One free cell beside a short block can unlock an entire sequence. Space near the edge can be deceptive: pushing a block there is easy, but bringing it back may be impossible once other pieces close the return route.
Before making the first move, mentally test at least two links: decide which obstacle must move and which piece must move first to create room for it.
How do you play step by step?
Build a short plan first, then execute it while checking the board after every move.
- Find the exit and target block - establish the exact direction in which the final corridor must open.
- Trace an imaginary line to the exit - identify only the blocks that directly prevent the target from leaving.
- Select the nearest obstacle - determine where it must go and which empty space can hold it.
- Inspect the obstacle's route - reveal the next dependency if the required cells are occupied.
- Continue tracing the blocker chain - reach a piece that can be moved without further preparation.
- Move the last block in the chain - create the space needed by the previous obstacle.
- Unwind the chain in reverse - clear the corridor without making unrelated moves.
- Slide the target block to the exit - finish as soon as the route is completely clear.
If a step fails, do not start trying every legal move. Return to the point where you assumed space would be available. That is usually where the plan broke: a cell is occupied, a block moves on a different axis, or the obstacle cannot move far enough to leave the corridor completely.
How does an automatic Wood Block Unblock walkthrough work?
A universal automatic walkthrough can work only when the solver receives an exact description of the current board.
A solving algorithm treats every legal move as a new puzzle state. It explores possible states, discards repeated arrangements, and searches for one in which the target can reach the exit. A game title or screenshot of a similar level is not enough. The solver needs the board dimensions, every block's position, length and orientation, plus the exit coordinates.
Without precise input, it is usually more useful to imitate the algorithm manually. Do not judge a move by whether the board merely looks more open. Compare positions using specific tests: did the required cell become available, did the blocker chain get shorter, and can the moved piece still return? Remember or write down only meaningful arrangements so you do not revisit the same failed position.
If you are looking for an automatic answer because the board is stuck, undo recent moves or restart first. Then analyze the puzzle from the exit backward. On a compact wooden block board, this is often faster than entering the entire layout into an external solver.
How do you find the blocker chain?
A blocker chain runs from the main obstacle to the first piece you can actually move right now.
Suppose a vertical block crosses the exit corridor. To move it upward, you need free cells above it. If a horizontal piece occupies those cells, ask where that piece can go. If a third block fills the space on its right, keep following the chain. Stop once you reach a piece with an immediately available direction.
Now execute the discovered sequence backward. Move the free piece first, then the newly released neighbor, and finally the main obstacle. This converts a confusing board into several small tasks. Check that an early move does not occupy a cell needed by another member of the chain one or two turns later.
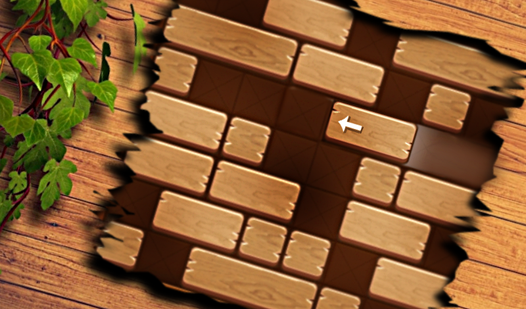
Why does an obvious move often create a dead end?
Most dead ends come from moving without checking the return route, not from the board being impossibly difficult.
An open space attracts attention, so it is tempting to fill it with the nearest block. That cell may be the only buffer available to another piece. The quick move leaves the main obstacle in place while removing the room needed to maneuver.
Another common mistake is clearing only one cell in the exit corridor. The obstacle moves slightly but still crosses the target's path. Before moving it, decide what position is actually sufficient. The piece must leave the corridor completely, not merely change its location.
Moving the target block too early can also cause trouble. It may occupy central cells that other pieces need to cross. If the full route is not ready, keep the target where it is or make sure the early move can be reversed easily.
Which tactics reduce the number of moves?
Backward planning, preserving a buffer, and choosing reversible moves are the most dependable tactics.
My tip 1. I scan from the exit toward the target rather than the other way around. This immediately reveals every piece crossing the final route. I ignore blocks outside that corridor until one of them is needed to free a specific cell.
My tip 2. I avoid filling the last empty cell in a crowded part of the board. That space acts as a buffer through which blocks can change order. If a move fills it, I first identify another move that will reopen it.
My tip 3. When two options look plausible, I choose the one that is easier to undo. A one-cell adjustment in an open corridor is safer than pushing a long block against the edge. A reversible move preserves alternatives if the original plan turns out to be wrong.
My tip 4. After two or three setup moves, I inspect the exit route again. The corridor may already be open, or the new layout may have changed the dependency order. This pause prevents extra moves made only because they belonged to an outdated plan.
Do not try to rearrange every block on the board. A clean solution often uses only a small group around the exit route. Other pieces matter only when they occupy buffer space or obstruct a member of the blocker chain.
How do you escape a dead end without random trial and error?
A dead end should be traced back to the last harmful commitment instead of being covered with more random moves.
Stop and draw the line from the target to the exit again. Name one specific obstacle. Determine where it needs to go and which required cell is currently unavailable. This gives the puzzle a clear objective again.
If undo is available, reverse moves one at a time. After each undo, check whether the lost buffer cell or the main obstacle's route has returned. You do not always need to go back to the beginning. Reaching the last position with at least two sensible continuations is usually enough.
After a restart, do not reproduce the old sequence from memory. Change the particular move that closed the important space. The rest of the solution may still be valid. Correcting one decision is faster than searching for an entirely new combination.
How do you choose the best move among several options?
A good move helps clear the exit corridor, preserves working space, and does not create a longer blocker chain.
Compare your options with three questions. Does the move release a cell you actually need? Can the block be returned easily? Does it avoid occupying space required by another piece? If one option passes all three tests, try it first.
When the choices appear equal, prefer the shorter movement. You do not have to push a piece to the end of every available corridor. Moving it only as far as necessary preserves more space and reduces the chance of blocking a future route. A long movement is justified only when you already know its purpose in the complete sequence.
FAQ
Can Wood Block Unblock be solved without hints?
Yes. Start at the exit, identify the first obstacle, and trace the dependency chain until you reach a block that can move immediately. Then execute the discovered moves in reverse order.
What should I do if the target is close to the exit but will not move farther?
Check every remaining cell in the corridor, including the cells near the edge. A partly overlapping piece can still block the path. You may need to move the target backward temporarily to create room for another block.
Why did the puzzle become harder after a useful move?
The move probably released one cell while occupying an important buffer or closing a return route. Evaluate the available directions for every piece in the blocker chain instead of judging the board by appearance.
Is there one automatic solution for every level?
No. Each solution depends on the exact positions, sizes, and orientations of the blocks. Only the method is universal: identify the exit corridor, trace the blocker chain, and unwind it from the last movable piece.