
Lost Jungle Match 3 Rules and Beginner Strategy

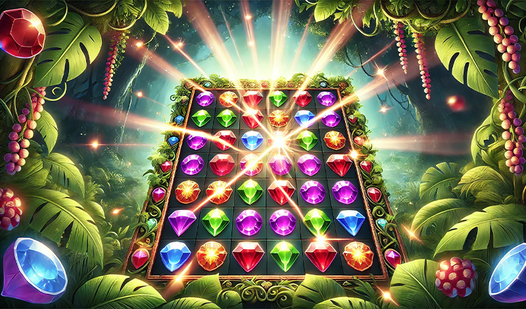
Lost Jungle is a match-3 game where you swap neighboring gems, form lines of three, and complete the round objective before running out of moves. The key to winning is resisting the first available match. Find the required pieces, inspect the lower part of the board, and choose a swap that advances the objective while opening another opportunity. The more often one move produces two useful results, the more consistent your runs become.
What are the rules of Lost Jungle?
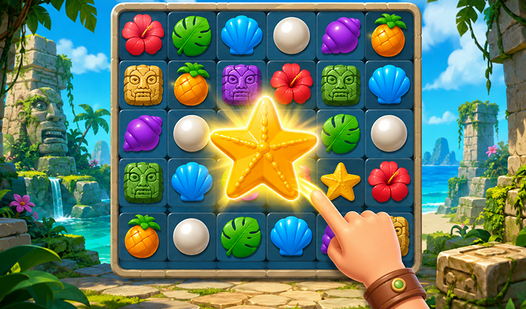
The rules are simple: swap two neighboring pieces to create a row or column of at least three identical gems, then complete the displayed objective within the available moves.
Matched pieces disappear and new ones fall from above. This changes the board and can trigger a cascade without costing another move. Do not judge a match only by the three pieces it removes. Think about what will fall into the empty cells afterward. A match near the bottom usually changes more of the board than an equivalent move near the top.
Identify the round objective before making the first swap. If you need a particular color, an attractive match in another color is useful only when it clears space or moves the required gems into position. If the objective concerns certain cells or blocked areas, make matches next to them. Treat score as a side effect unless the game specifically makes points the objective.

How do you play step by step?
Use a short decision cycle: check the objective, read the board, choose the best swap, and review the result.
- Read the objective - identify which pieces or sections of the board matter most.
- Check the moves left - judge how carefully you need to spend each turn.
- Inspect the lower rows - find swaps that can rearrange more pieces through a cascade.
- Locate objective pieces - see where a single match can create direct progress.
- Find two or three candidates - avoid spending a move on the first match you notice.
- Compare the outcomes - choose the swap that opens space or prepares another match.
- Make the move - clear the match and receive a new board position.
- Wait for the cascade - avoid planning around pieces that are still moving.
- Recheck the goal and moves - see whether your current approach is working.
- Change priorities if behind - direct the remaining swaps toward the required objective.
Do not try to calculate the entire round in advance. Falling pieces change part of the layout, so it is more reliable to plan one strong move and one possible follow-up. This short planning horizon reduces mistakes and stops you from chasing a combination that a cascade has already broken.
How can you complete the objective faster?
The fastest route is to choose double-purpose swaps that collect required pieces while improving an awkward section of the board.
Review your progress after every move. Compare the remaining objective with the moves left, not as an exact formula but as a warning signal. If much of the goal remains and the counter is low, neutral matches have become too expensive. Look for a direct objective match, a cascade near the target area, or preparation for a larger combination.
Do not clear a convenient area automatically. Sometimes one section keeps producing easy matches in the required color. Keep using it while it provides progress instead of breaking it for an unrelated match. If objective pieces are trapped near an edge, however, move the action toward them. Clear neighboring lines, open cells, and preserve several options for the next swap.
When you can either make a little progress now or prepare two possibilities for the next turn, let the move counter decide. Preparation is reasonable when you have room to work. Near the end of a round, take guaranteed progress because the next falling pieces cannot be predicted.
How do you find valuable matches?
The most valuable match is not always the largest one: the best swap advances the objective, keeps the board flexible, and leaves a useful continuation.
Scan the grid in a fixed order, such as left to right and bottom to top. This makes missed moves less likely and prevents you from repeatedly checking the same places. Look for objective matches first, lower-board options second, and moves near edges or blocked areas third.
Watch for nearly completed shapes. Two identical gems together with a third one separated by a single cell often provide an easy swap. Two potential lines that cross are more valuable than an isolated line because one move may affect both a row and a column. Even when the larger match does not happen immediately, this setup can preserve more choices.
The center is usually more flexible than the edges. A central piece has more neighbors and therefore more possible swap directions. That does not mean you should ignore the edge. If required pieces collect there, delaying the problem can create a late-round trap where the right gems are present but cannot be joined.
If a larger match creates a special piece, do not activate it automatically. First check whether its effect reaches the objective and whether it can be combined with another useful match. The exact power-up behavior may vary, but the rule stays the same: judge an effect by how many required pieces or difficult cells it can reach, not by how dramatic it looks.
Why do moves run out and how can you avoid losing?
Moves usually run out after a series of weak swaps, so check whether each action changes the objective counter or clearly improves the next position.
A common mistake is clearing every available three-piece match. Each one looks productive, but several neutral swaps quietly consume the entire allowance. Another mistake is spending too long building a perfect combination. Preparation makes sense only when the setup moves also help or when the remaining counter gives you enough room to take the risk.
Use a simple decision threshold. Early in the round, you can spend a move restructuring an awkward board. Around the middle, check whether you have completed a comparable share of the objective. Near the end, abandon elegant plans and take guaranteed objective matches. Exact percentages are unnecessary. You only need to recognize when there is no longer room to experiment.
Avoid swaps that leave a required color isolated in a corner or along an edge without a matching partner. It can be better to remove a neighboring color so the required gems fall closer together. That is not direct progress, but an indirect move should have a clear purpose rather than relying on luck.
Which match-3 techniques do I use?
I rely on four techniques that reduce dependence on random drops and make every move more deliberate.
- I start my search at the bottom. A match in the lower rows shifts long columns and has a better chance of causing a free cascade, but I first check that it will not break an almost completed objective match above.
- I compare each move with its alternative. If two matches provide the same progress, I choose the one that leaves pairs of identical gems nearby or opens the center.
- I do not save a power-up only for the finale. If a special piece can already hit several targets and clear a cramped area, I use it. Waiting for a perfect moment can cost multiple empty moves.
- I pause after a cascade. The new grid needs a fresh scan, and the old plan may be weaker than a direct match created by the falling pieces.
Another useful habit is to describe the purpose of a move in a short phrase: collect the target, open the edge, or prepare a crossing match. If the explanation is merely ‘let us see what falls,’ the move is probably too random. This check is especially helpful when the board contains many available matches that initially look equal.
What should you do when no useful move is visible?
If you cannot find a useful move, stop looking only for completed triples and search for a swap that will connect separated pairs after one drop.
Check the board systematically. Review horizontal possibilities, then vertical ones, followed by the edges and lower rows. Look beyond identical pieces and consider the empty space a future match will create. Removing a neighboring line can sometimes let a required gem fall directly beside its pair.
If the game displays a hint, treat it as a legal move rather than an automatically optimal one. Compare the suggested swap with the objective. It may do nothing more than keep the board moving. If no swaps exist and the grid reshuffles automatically, scan every area again because previous setups no longer matter.
Do not make rapid swaps out of frustration. A match-3 loss often begins not with an impossible layout but with two rushed decisions in a row. A short pause costs less time than restarting the round.
How can you tell whether your strategy is working?
Your strategy is working when the objective shrinks consistently, the board remains flexible, and the move counter does not fall faster than your progress.
Judge a series of decisions rather than one lucky cascade. A random drop can rescue a poor swap, but that does not make the choice repeatable. A sound plan produces a clear benefit even without luck. It collects the required color, opens a difficult edge, brings pairs together, or creates space for new pieces.
After a failed attempt, review your last three decisions. Did one of them have no connection to the objective? Did you spend several swaps preparing a power-up that you never used? Did you leave a difficult edge until the end? This review is more useful than deciding the layout was impossible. Change one habit on the next attempt, such as switching to direct matches sooner or checking the bottom more often. You will then see which adjustment actually improves the result.
FAQ
What do you need to do in Lost Jungle?
Swap neighboring gems and form lines of three identical pieces while completing the round objective before the available moves run out.
Should you always choose the largest match?
No. A smaller combination is better when it directly advances the objective, opens a difficult area, or preserves useful options for the next move.
Why is matching near the bottom useful?
A lower match shifts more pieces above it and increases the chance of a cascade, but skip it if it would destroy an almost completed objective combination.
What should you do when only a few moves remain?
Stop making long preparations, recount the required pieces, and choose guaranteed progress; take a risk only when no direct solution remains.